Photography editing guide in the style of photographer Slava Seneiuta. Can be completed with your own images or stock. Quite a simple editing process that teaches a diverse range of skills that can be applied to most photographic projects including: Colour adjustment, Pen tool, removing backgrounds, gradient, eye dropper and local adjustments.
Suitable for all governing bodies. Mainly for those with some photographic experience. Perfect for end of year if in a rush or to help develop the skills needed to be successful on a photography A level or GCSE.
A full guide on how to edit in the style of Liz Orton. Made for use with Photoshop but can also be used with online software like Photopea. Great for GCSE and A level pupils who want an editing technique that looks really slick and isn’t that challenging.
Photography guide for the levitation technique of photographer Franck Bohbot. Teaches essential photoshop skills like layer masks, colour manipulation and drop shadow to name a few. Great for ks4 or 5 and can techniques can be used if looking at other photographers who focus on levitation like Li Wei.
Photohunt designed for keystage 3 pupils. Project designed for online or at home learning which asks pupils to take photos of objects that look like letters and examines forced perspective. Has a range of supporting theory and guides for editing images once taken. Supporting powerpoint for delivery in class. Runs for around 6-8 lessons.
A full guide on how to edit in the style of Tom Lewis’s Neon Beasts project. Made for use with Photoshop but can also be used with online software like Photopea. Great for GCSE and A level pupils who want an editing technique that looks really slick and isn’t that challenging. Can be completed with use of a drawing board.
Photography resource that focuses on students telling a story using imagery. Can be completed on phones and software like powerpoint to present images. Perfect for those who are new to teaching photography and want a great unit that can be completed on any budget. Comes with both booklet and supporting powerpoint.
Lesson and information sheet detailing how students can best complete an artist research page. For this activity I have picked an artist I always use at the start of a manipulation year long scheme of work I have designed. The photographer is Ulric Collette, who I picked because it’s a fun activity (face merge) that teaches essential skills like local adjustments and layering.
This pack includes the artist research which has a powerpoint that has a checklist of all that needs to be considered for artist research or images analysis, examples, and an artist research help sheet that has all the relevant information about photographer Ulric.
Perfect for the start of year and could be adapted for any artist you choose. Designed for AS and year 10 and those starting out in photography.
Works well when coupled with the Ulric Collette shooting plan and guides.
Powerpoint that details how to produce a shooting plan and then use lighting to create different aesthetics. Focus on flat lighting as project is based on the work of photographer Ulric Collette and his face merges.
Includes an in-depth breakdown of how to decipher where a photographer has positioned lighting, examples of how lighting positioning affects imagery, how to produce a plan for shooting and finally, a checklist that details all things to consider when shooting or producing a plan.
Designed to go with the Ulric artist research and image analysis, contact sheet and editing guide and the final piece write up lessons. Perfect for year 10 or AS but can be implemented anywhere on a photographic scheme.
Lessons to teach students the basic camera settings that should be utilised in order to create different aesthetics.
Focus on shutter speeds, aperture and ISO. The exposure triangle is so important in photography I always try to make sure students have a good understanding of how to control the camera. There are three practical tasks included in project:
1, Asking students to show both a deep ad shallow depth of field in their images.
2, Students show both a slow and fast shutter in their imagery.
3, Create a contact sheet for both shoots then evaluate
Great for both GCSE and A level. Mainly aimed at those who have not studied photography before but also useful for those who have.
Lots of helpsheets and examples of each to help build understanding.
A full guide on how to edit in the style of Graphic Designer: Hattie Stewart. Made for use with Photoshop but can also be used with online software like Photopea. Great for GCSE and A level pupils who are more able and want an editing technique that will challenge them and allow them to be creative.
Great photoshop editing guide for a floating person in the style of photography Andreas Lie. Can be completed with your own images or stock. Useful for students who have some photoshop experience and those who would like to learn useful techniques. Teaches students how to blend layers, use spherical distortion, blend multiple layers, colour manipulation and local adjustments.
Suitable for all governing bodies. Teachers would need some photoshop experience for this one and I would recommend creating an edit yourself before giving it to a class. Perfect for end of year if in a rush or to help develop the skills needed to be successful on a photography A level or GCSE.
In depth editing guide inspired by the photographer Cristian Grotto. Multiple techniques including: enlarging, liquify and layering. Quite an advanced editing technique that takes time to complete. Will be perfect for higher ability students who feel confident on photoshop and want a challenge
In depth editing guide inspired by the photographer Micaela Lattanzio. Multiple techniques including: fragmenting, drop shadow, layering and selection tools. Quite an advanced editing technique that takes time to complete. Will be perfect for higher ability students who feel confident on photoshop and want a challenge. GCSE later years or A level would make good use of this.
Photoshop guide to teach and support student whilst editing. Inspired by Matthieu Bourel’s work, the guide teaches a number of techniques including lasso select, gradient filters, selection contracting and layering. Quite an advanced editing technique for more able students.
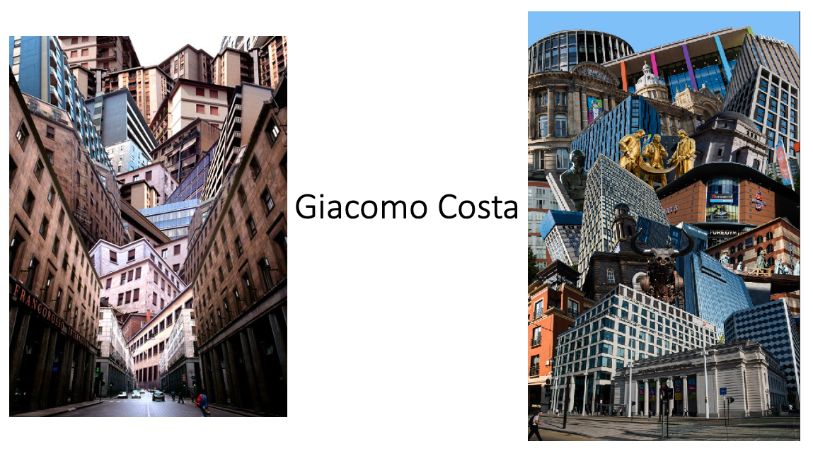
Adobe photoshop editing guide in the style of photographer: Giacomo Costa. Could also be used with free editing websites like photopea.
Shows students how to use a diverse range of tools in order to create a piece with buildings stacked on top of each other.
Perfect for GCSE or A level. Designed for OCR, AQA and WJEC but could be used with any others. Also edit can easily be differentiated because the edit can be as expansive as you like depending on how many buildings are added.
Guide on how to create a contact sheet then produce an editing page for face merge workshop. Also includes an editing guide that details how to create a face merge on photoshop.
Perfect for all levels of photographic study but designed for year 10 and AS. Part of the Ulric Collette face merge unit I have designed. Teaches students how to show and present their images with annotation. Also includes a guide on how to create a detailed editing page whilst editing. Workshop focuses on basic photoshop skills that are utilised regularly when editing. Layer blending and manipulation is so integral to photoshop that I try to ensure my students have a good understanding of these at the start of any photographic course.
Photography scheme of work that focuses on Portraiture and thework of Platon. Very in-depth scheme that includes work booklet, supporting powerpoint, homework, marking areas and editing guide. All made for Adobe photoshop.
Great for any KS3 or KS4 teacher of Art or Photography. Runs for 10 weeks and is designed to prepare students for GCSE. Has all AO criterias covered so is perfect to set expectation for GCSE.
Made by a professional photographer with over 20 years experience
Booklets designed so students have everything needed for Assessment objective 1 in the same place. Comes with background information, images, key words and questions to help with annotation. Artists covered are:
Helmo
Franck Bohbot
Andres Gallardo Albajar
Brno Del Zao
Lisa Creagh
Ulric Collette
Li Wei
Matthieu Bourel
Paul Reiffer
Victoria Seimer
Aneta Ivanova
Merve Ozaslan
Teaching all the essentials to students who have just started studying photography. Starts with the basic skills, then composition and then a Platon focused portraiture project.
Each booklet comes with supporting powerpoints and homework as well as editing guides.
Full unit of work that focuses on Helmo’s Fashion animals series. Teaches everything that is need to hit each assessment objective both at GCSE and A level. This includes:
Artist research and image analysis
Shooting plan and lighting analysis
Contact sheet creation and best images section
Editing pages production
Editing guide explaining how to produce work
Best edit (final outcome) presentation and annotation guide
I use this as the third artist inspired unit that I complete near the start of any photographic course because of the focus on studio lighting, but also because of the simple editing techniques that cover blending modes. Students also learn what is required to hit each assessment objective and helps them gain an understanding of how to present their work in a detailed and reflective way.
Includes stock images of animals for editing.
One of my favourite units as the outcomes can be quite sophisticated considering the process is so simple.